Ask ChatGPT to build you a website and it will happily generate HTML, CSS, and copy for a homepage. What it won't do on its own is put that code on your site. You still have to open the WordPress code editor, paste the markup in, and fix whatever broke.
That's the workflow behind most “build a website with ChatGPT”, and it's fine for a one-off landing page. It stops being fine the moment you want to adjust something next week.
Sydney's AI Abilities feature closes that gap for sites built on the theme. It's built on WordPress's Abilities API, an open standard.
ChatGPT can read your site's actual settings and change them directly through a live connection called MCP. MCP is short for Model Context Protocol. It's the standard that lets an AI assistant act on a site directly, instead of just chatting with you about it.
This guide covers that path specifically. Not planning a site with ChatGPT's help, but having it build and adjust a live Sydney site.
Before you start
You'll need:
- A WordPress site on version 6.9 or later.
- Sydney theme, version 2.70 or later (free).
- The free WPVibe plugin installed on your site.
- A ChatGPT account that includes apps, which means ChatGPT Plus or higher.
Step 1: Turn on AI Abilities
AI Abilities is off by default, on purpose: nothing outside your site can see or touch your settings until you explicitly turn it on. That's the setting you check first on the site before connecting anything.
Go to Sydney > Theme Dashboard, open the Settings tab, and find the AI Abilities section. There are three modes to choose from:
- Off: The default. AI assistants can't see or touch anything.
- Read-only: Assistants can look up your settings but can't change them.
- Read & write: Assistants can read, change, build pages, and install recommended plugins.
For this guide, we pick Read & write for the session where changes actually get made.
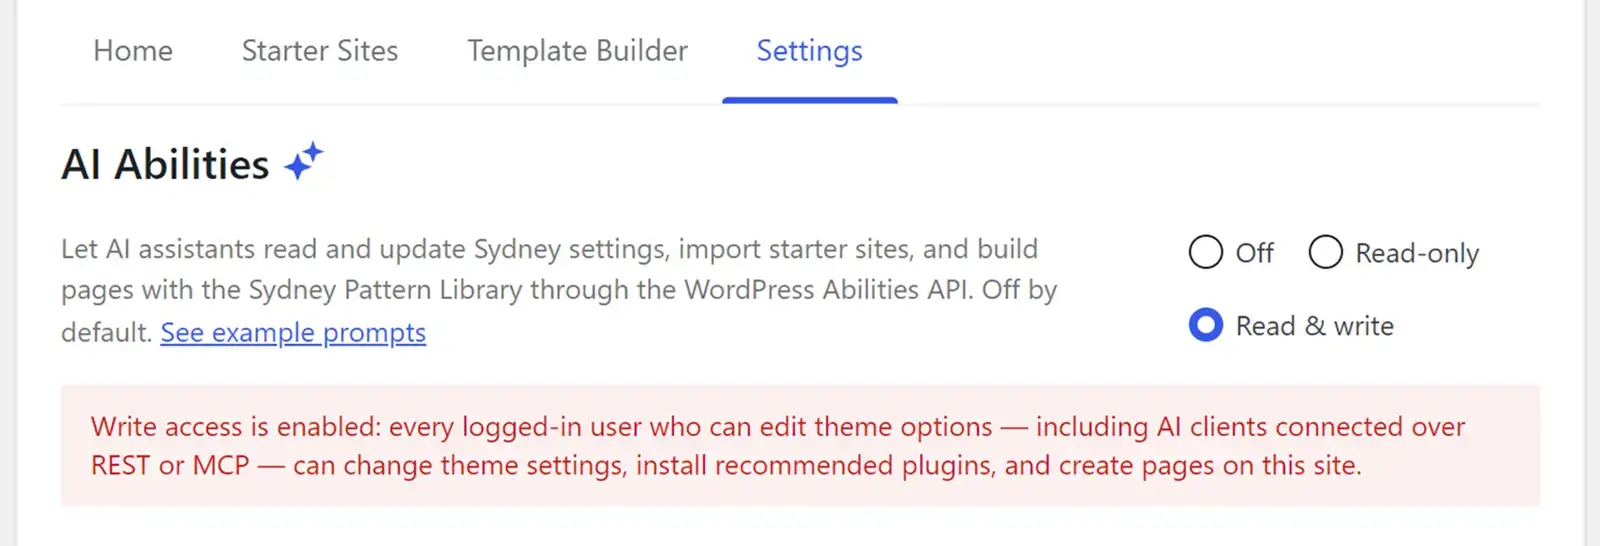
Success signal: the AI Abilities section shows “Read & write” selected and saved.
Step 2: Install the free WPVibe plugin
Turning on AI Abilities only exposes the settings. Something still has to carry the connection between your site and ChatGPT, and that's what WPVibe does. It's a free plugin from SeedProd that exposes Sydney's abilities over MCP, the standard AI assistants use to connect to outside tools.
Install and activate it the way you would any WordPress plugin: Plugins > Add New, search “WPVibe,” install, activate.
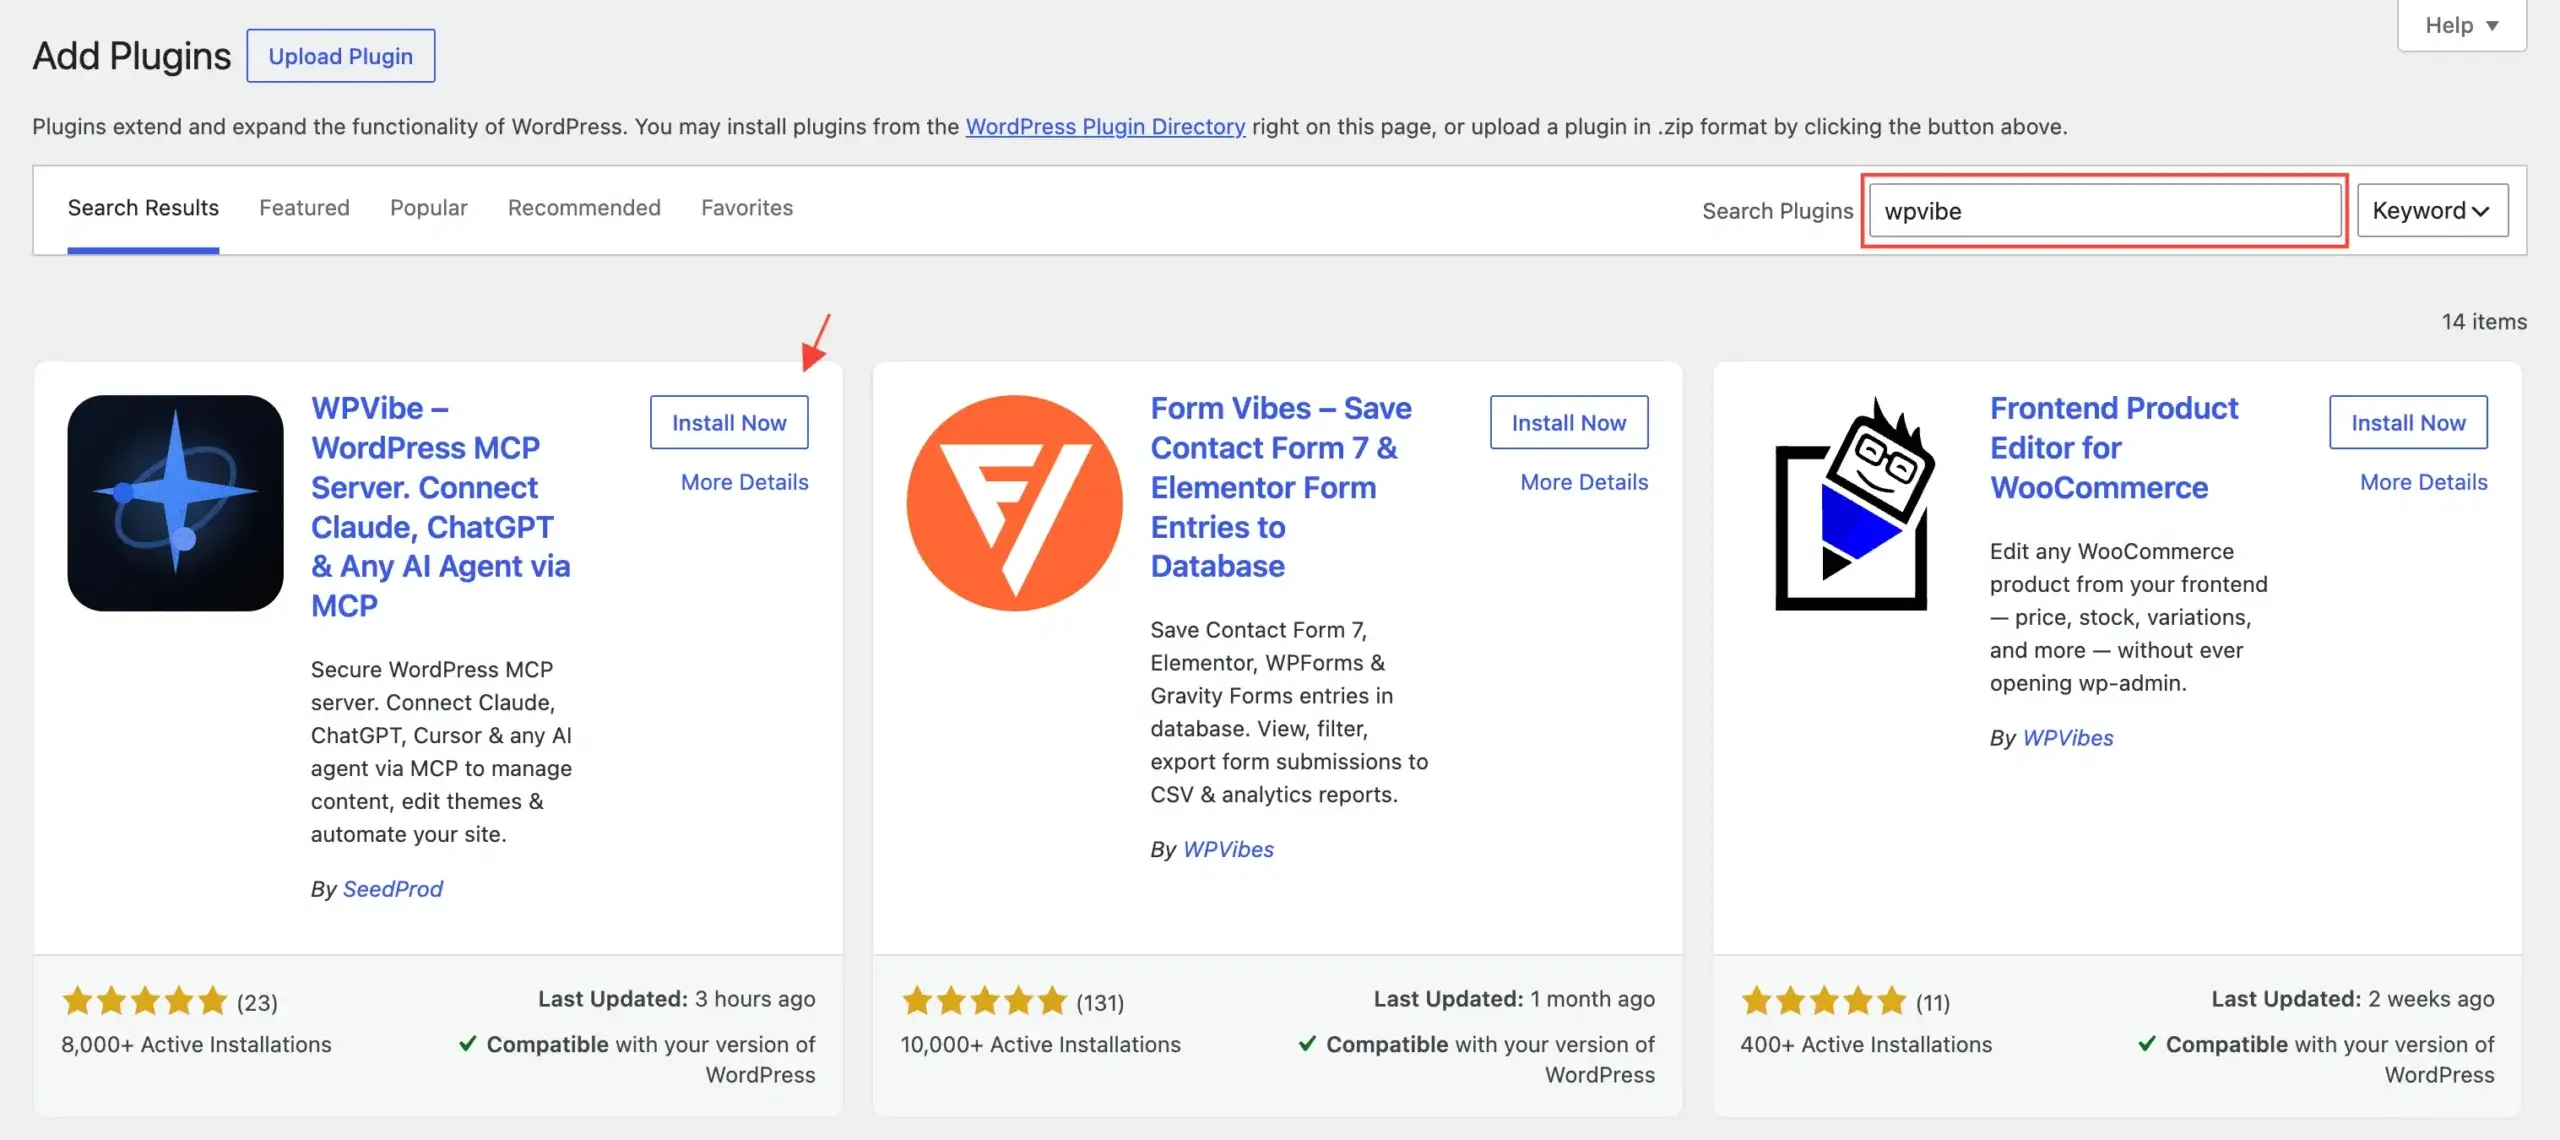
Success signal: a new “WPVibe” item appears in your WordPress admin menu.
Step 3: Add WPVibe as an app in ChatGPT
ChatGPT handles this differently than you might expect: instead of pasting a connection URL, you add WPVibe as an app from ChatGPT's own directory. That keeps setup quick, since ChatGPT already knows how to work with apps listed there.
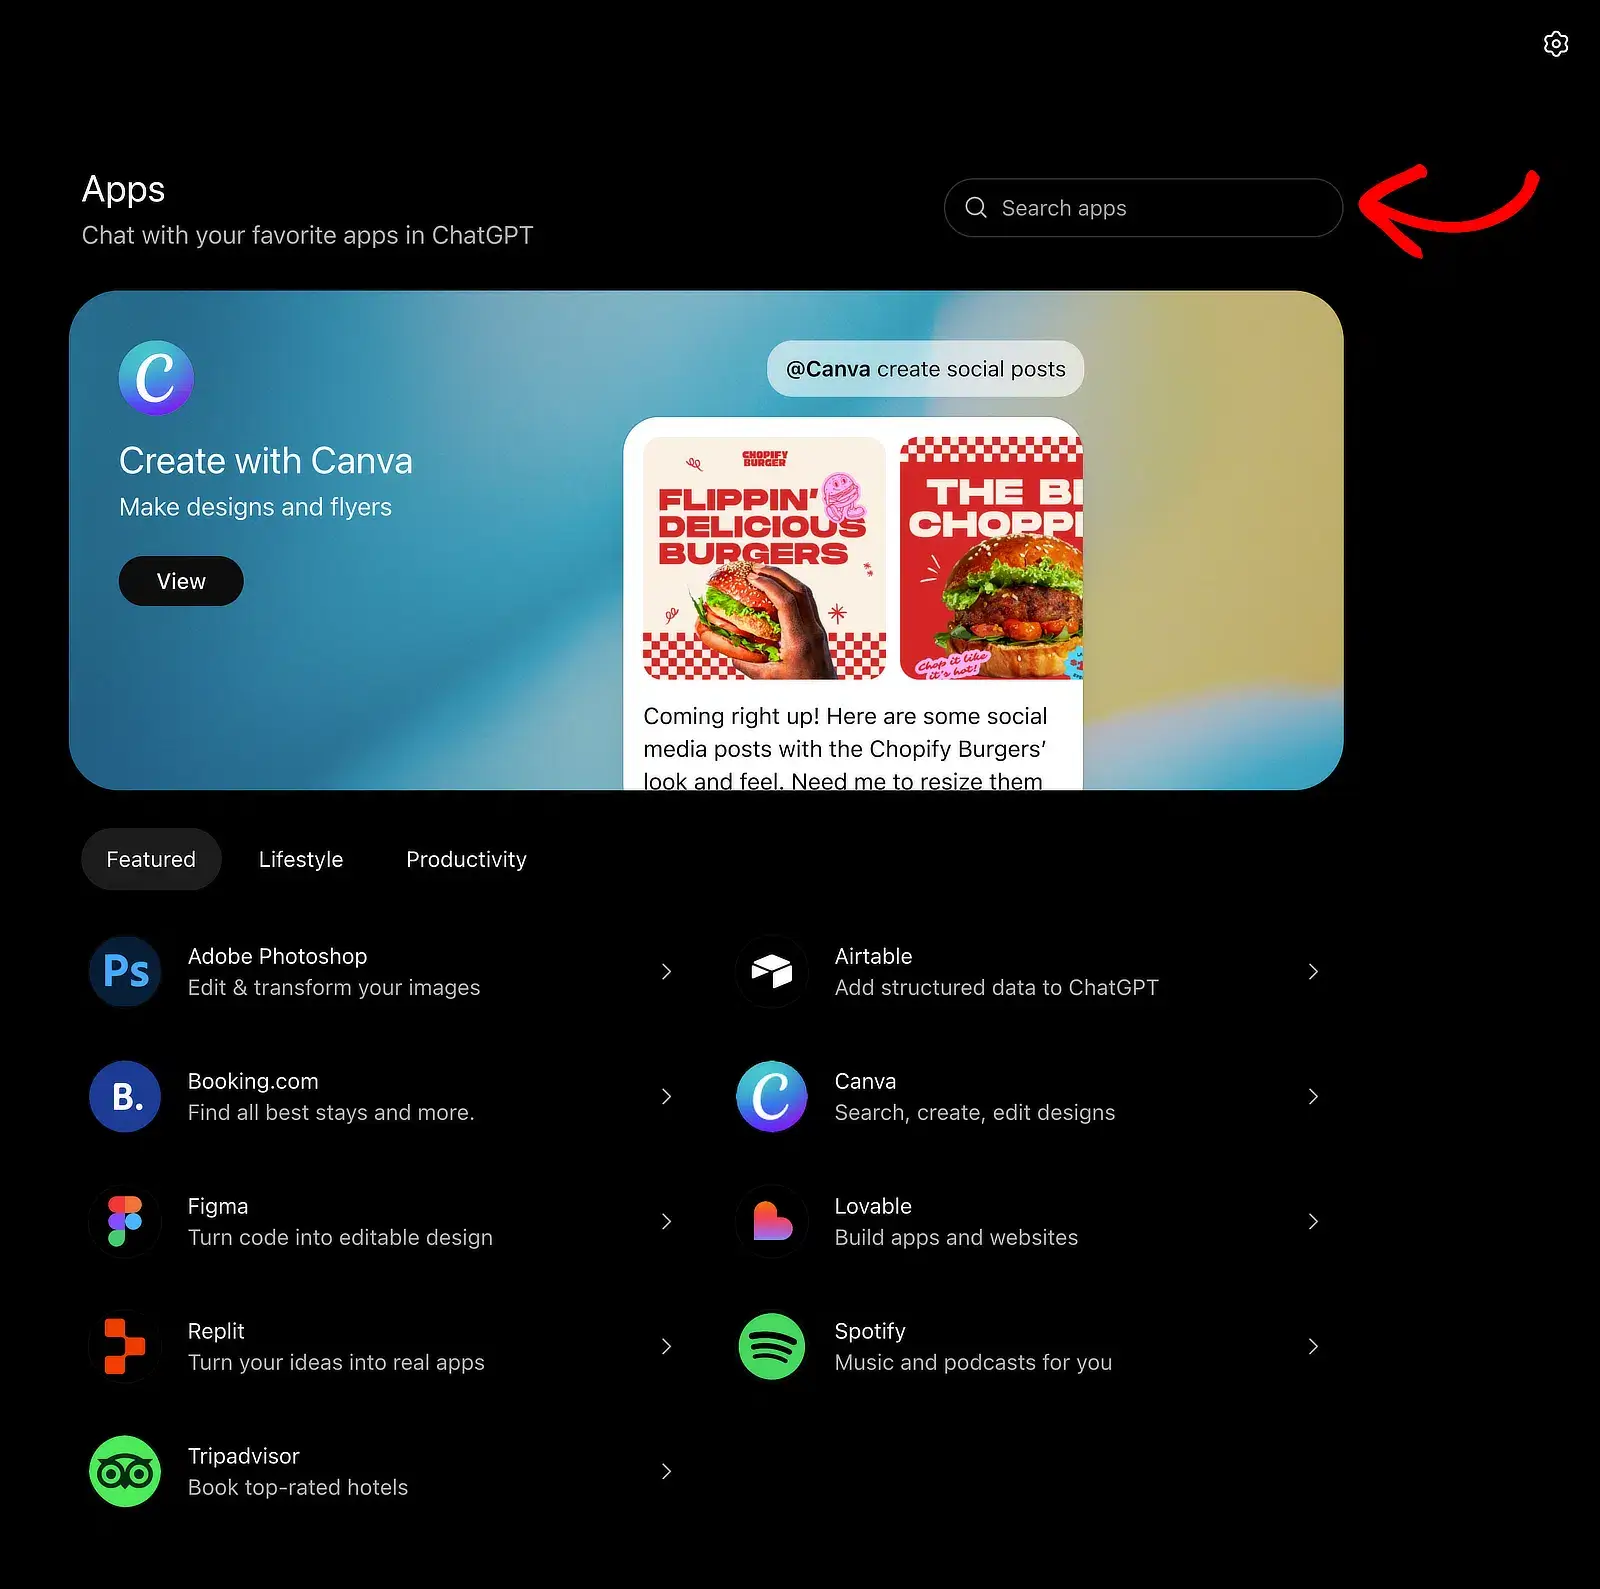
In ChatGPT, open Apps from the sidebar and search for WPVibe. The Apps directory is where ChatGPT connects to outside tools you already use, the same place you'd find Canva or Booking.com.
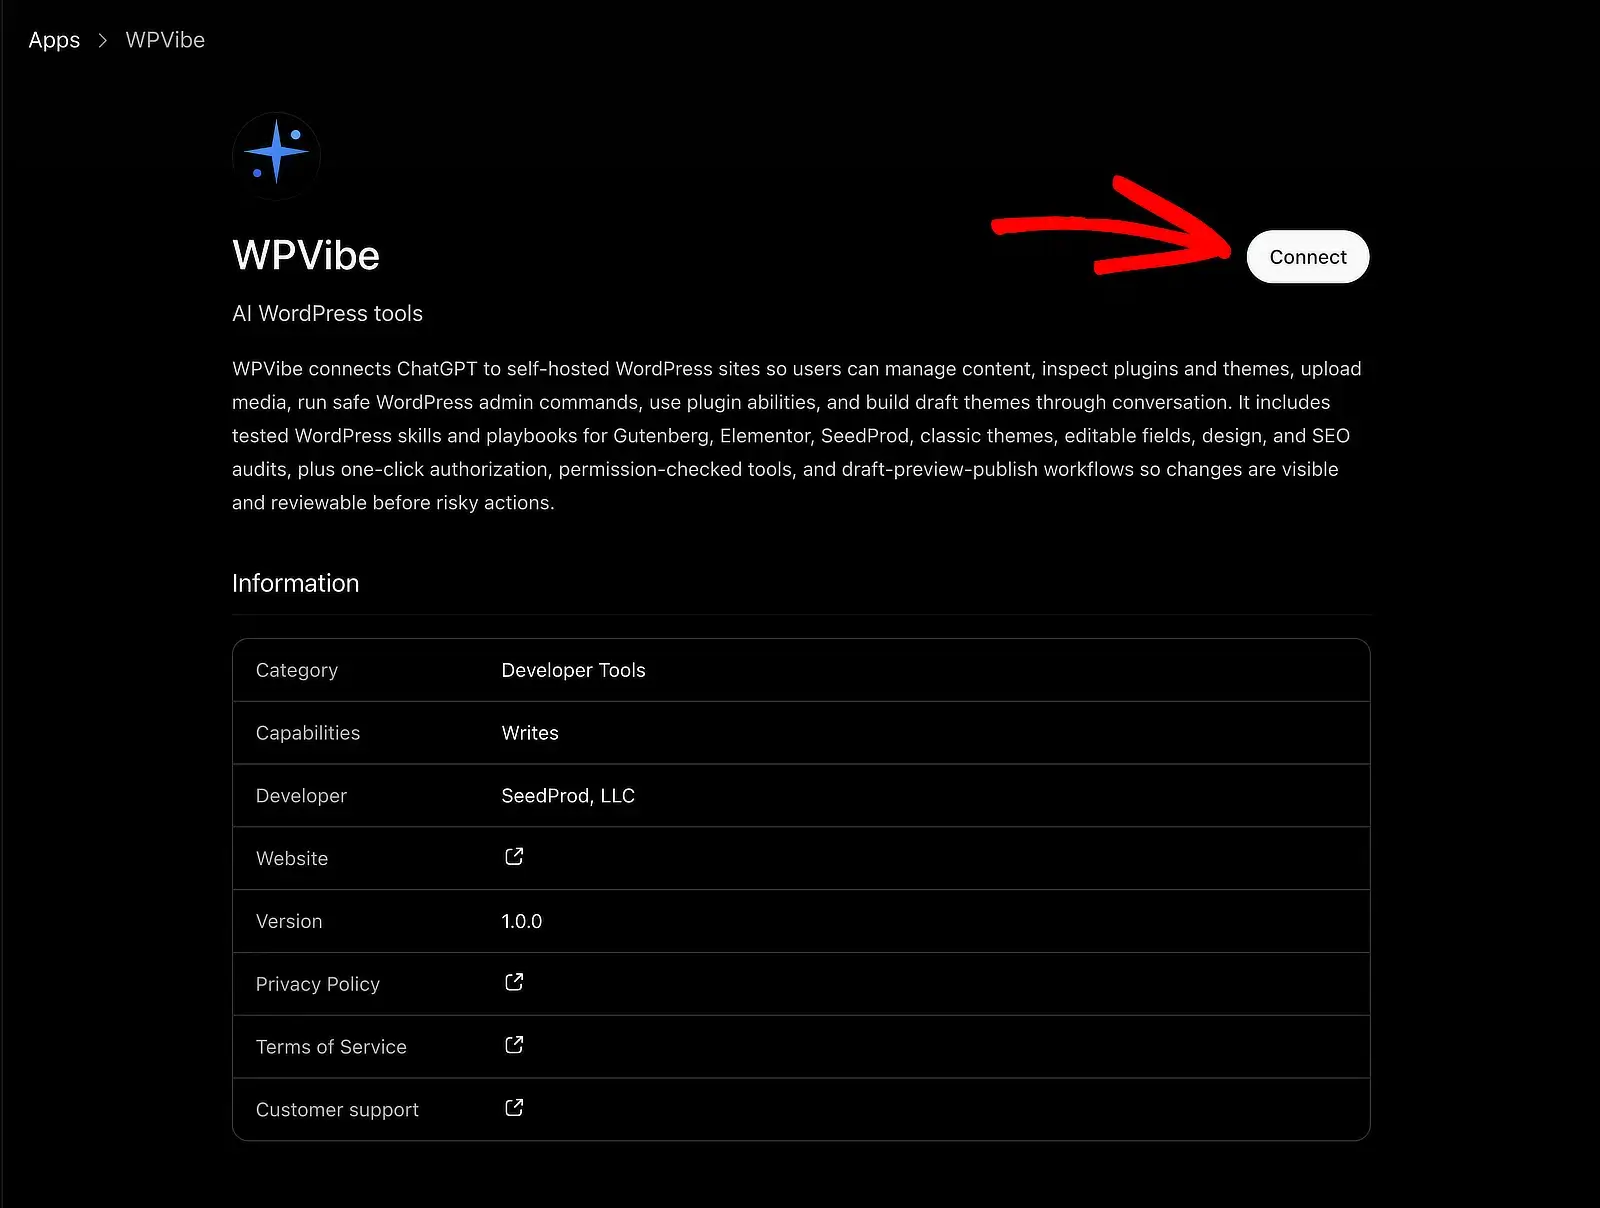
Open the WPVibe app and click Connect in the top corner. The app page lists its capability as “Writes,” since it can build and change content on your site once you've allowed it to.
A window titled “Add WPVibe to ChatGPT” appears with a short note reminding you that you stay in control of what the app can access. Click “Sign in with WPVibe” to continue.
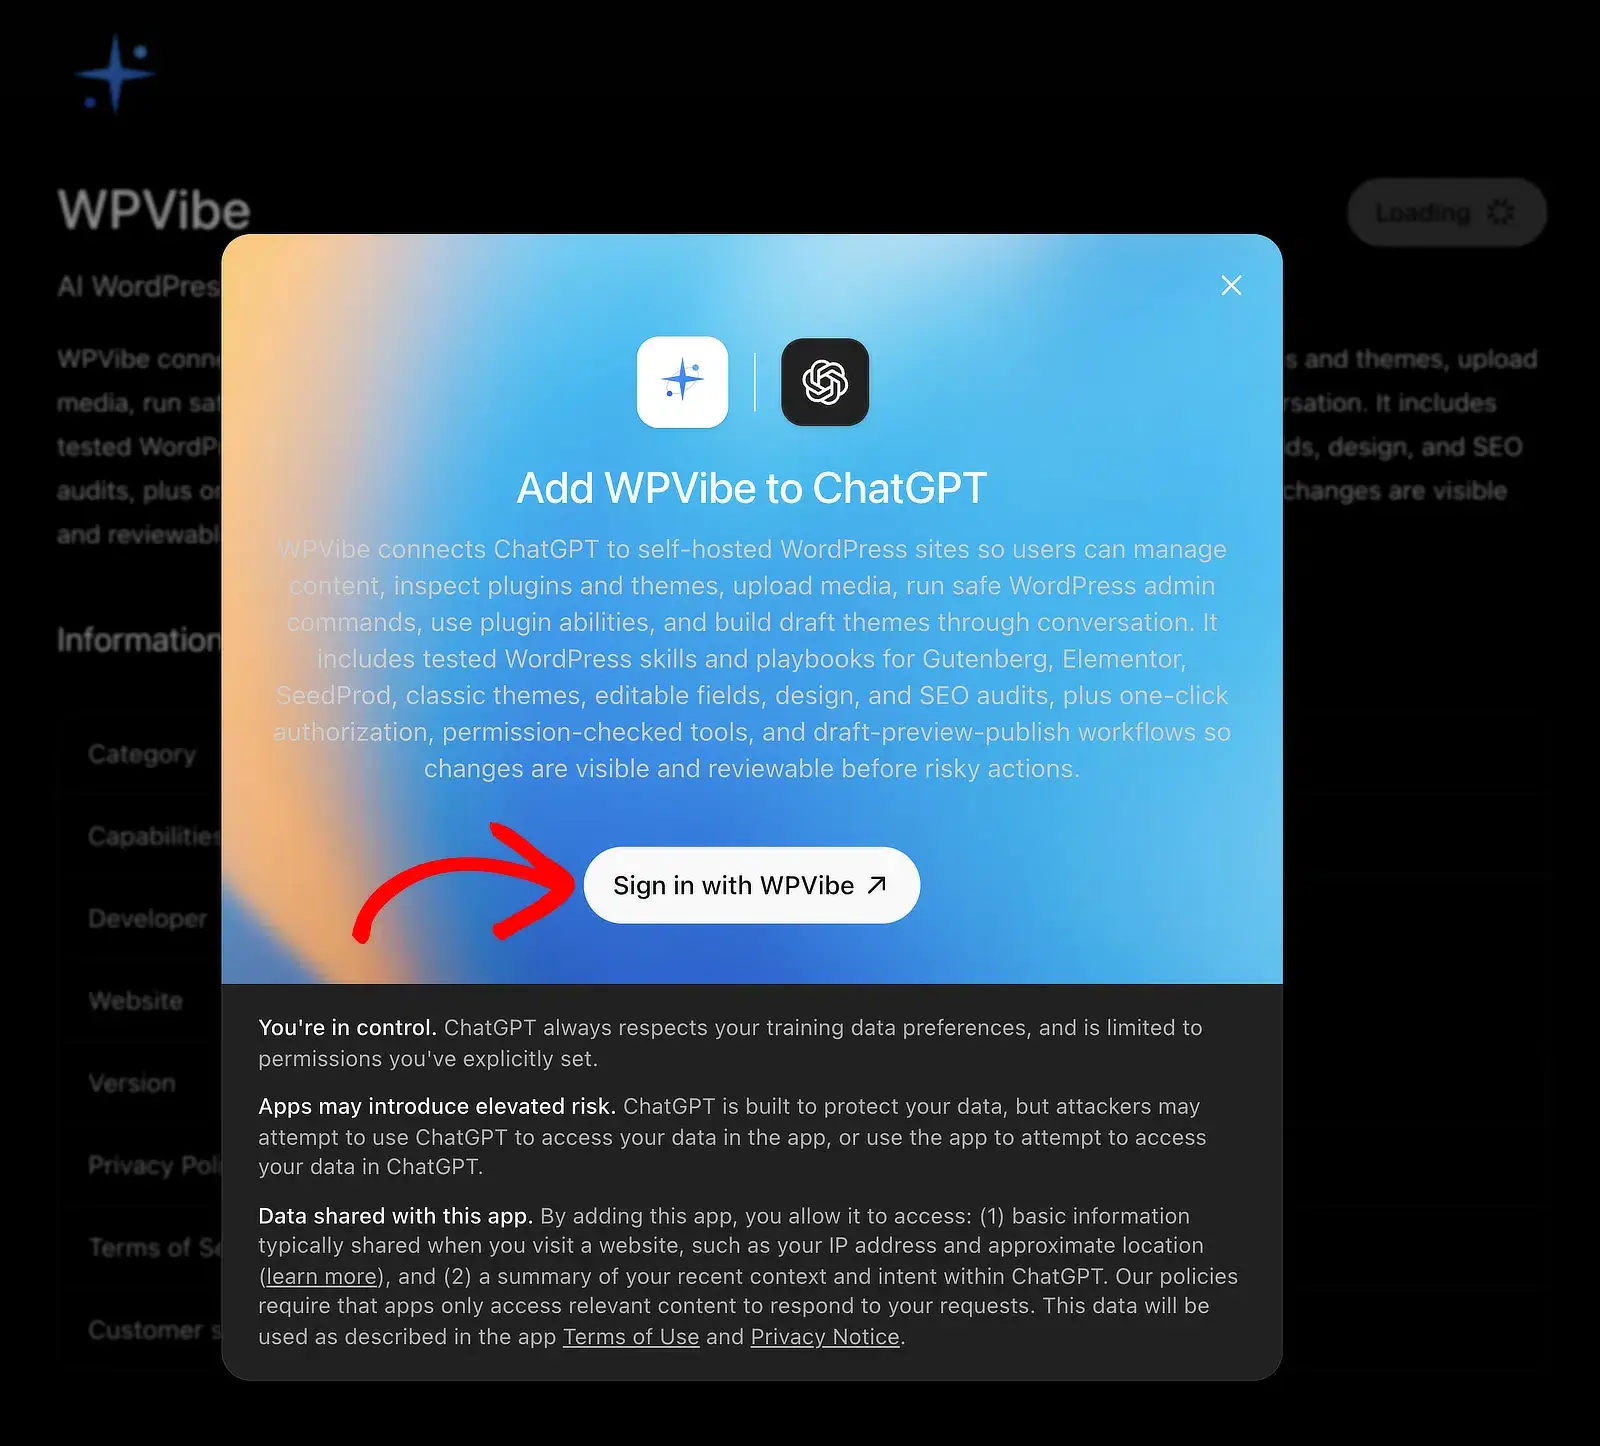
Success signal: the sign-in window opens and asks for your email.
Step 4: Sign in and connect your site
This is the step people hesitate on, and reasonably so: you're about to let an outside AI assistant touch a live client site.
Here's the reassurance worth knowing before you continue. WPVibe signs you in with a magic link sent to your email, not a password. You never type or share your WordPress login with ChatGPT at any point in this setup.
Enter your email on the WPVibe sign-in page. It sends a magic link. Open the email and click Sign In to finish.
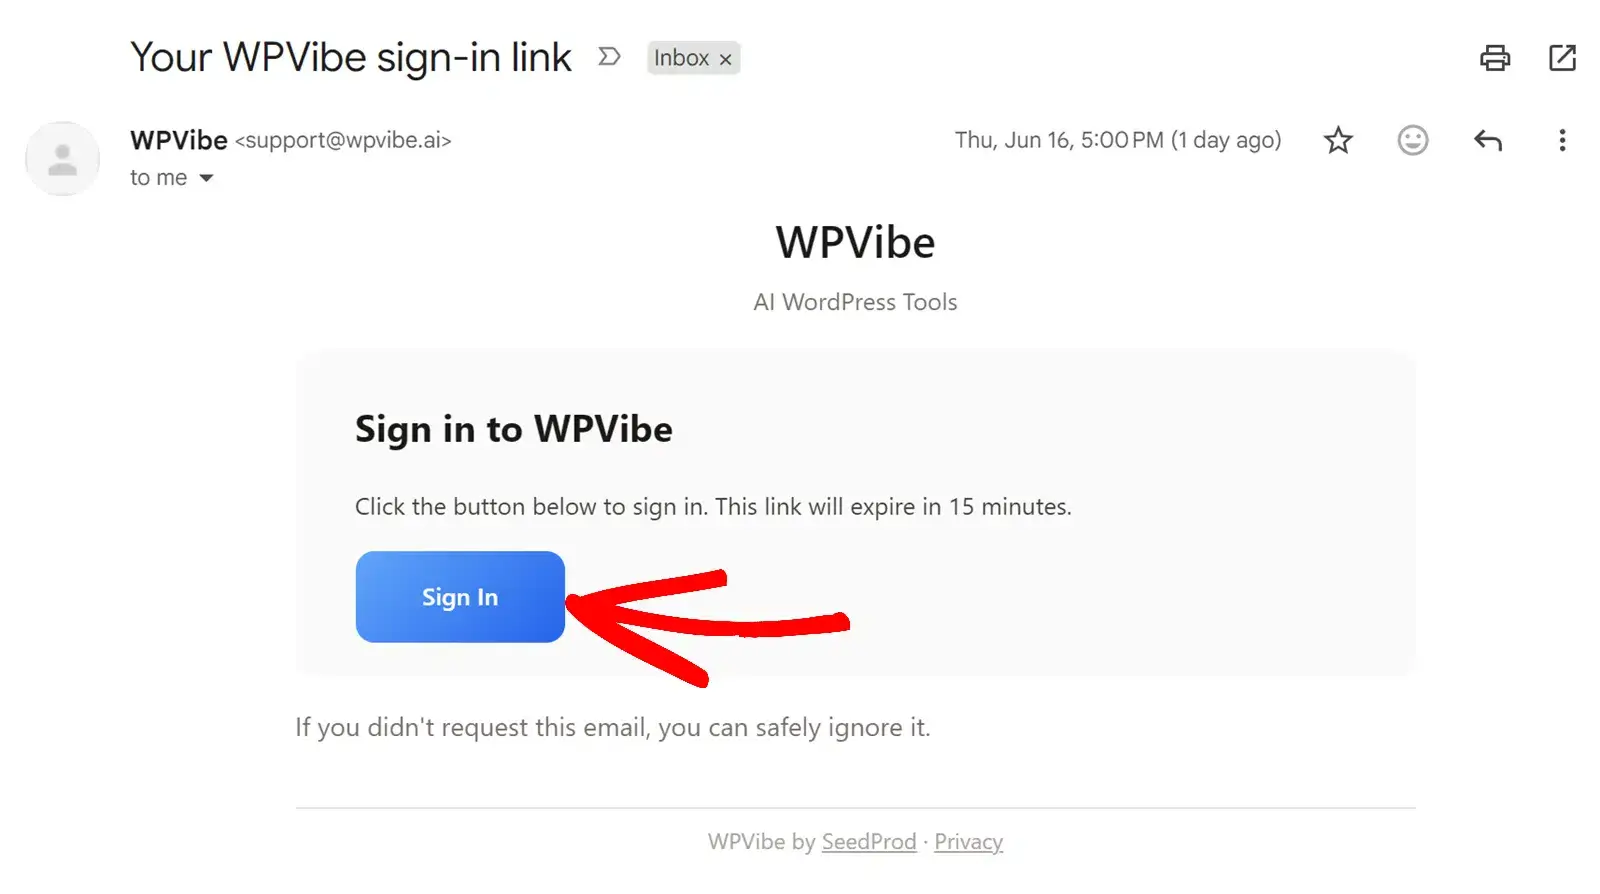
The link expires after 15 minutes. If it doesn't work, request a fresh one rather than troubleshooting an old link.
The app is connected at this point, but ChatGPT still doesn't know which site to work with. In a new chat, type:
“Connect my site at yoursite.com” (using your real domain).
Success signal: ChatGPT confirms the connection and shows details back, including your WordPress version and active theme. It also confirms the site supports the Abilities API.
Before your first live edit: back up your current site
Once ChatGPT is connected with write access, it can change your palette, typography, and header or footer layout directly. Before you ask it to change anything on a real site, back up your current site. That gives you something to restore if a change isn't what you wanted.
What happened when you asked it to match a client's brand
Let's say you are onboarding a new client, a small home goods vendor with a logo in a specific shade of terracotta. The site was already built on a Sydney starter site, but the accent color was still the theme default. In the ChatGPT chat where the site was connected, we typed:
“Update the accent color to match their brand.”
ChatGPT read the site's current theme settings, picked a terracotta shade close to the logo, and applied it. Refreshing the site showed the new accent color on buttons, links, and hover states, exactly as asked.
What else you can ask it to do
Beyond color, AI Abilities covers most of what you'd otherwise do manually in the Sydney Customizer or Site Editor:
- Typography: fonts, sizes, and spacing across the site.
- Header and footer layout.
- Building a page from Sydney's block patterns, from a description.
- Importing and branding a starter site.
Each of these works the same way: describe the outcome, ChatGPT reads your current settings, applies the change. Check the result on the whole page.
What ChatGPT still can't do here
AI Abilities gives ChatGPT access to Sydney's own settings surface. It won't write a custom PHP function, install a plugin outside its recommended set, or fix something outside what Sydney and its block patterns expose.
Next step
Starting from scratch rather than an existing Sydney site? Browse Sydney's starter site demos first. Have ChatGPT import and brand one instead of building from a blank page.
Get started today with the easiest WordPress theme. Sydney Pro includes lots of free starter templates and offers a 14-day money-back guarantee.
If this article helped you out, follow us on Facebook and X (Twitter) for more WordPress tutorials and guides.